
“I think the eyes flirt most. There are so many ways to use them.”
Anna Held
One of the many injustices we face as we grow wiser is…the thinning of our eyelashes.
How vapid of me, right?! We do what we can. I say control those things within your power.
Why is it even worth talking about? Eyes communicate a lot. When our eyelashes “disappear” it can make our eyes fade into the background. Even in 1300BC in Nefertiti’s days, women have done things to accentuate their eyes. Eyes pull attention and most of us really enjoy a little attention now and again, right? We want to get that “Pop!” back so our eyes stand out! Even if you don’t wear any make up, having dark, full lashes makes you look awake and ready for anything!
Why do they thin? For a long list of reasons. Some of it is simple age…our follicles aren’t as hardy as the years pass. Some of it is treatment…do you rub your eyes, do you *gasp* sleep in makeup overnight? The good news is, you can address most of it.
This started as a request to review magnetic lashes – but you know me, thorough is my middle name, and I have to learn as much as I can first.
Restoration
Let’s start with restorative measures. Many of my friends have been using lash growth serums for many years with good outcome. The market has tons of options:
- Latisse®
- Rapidlash
- Revitalash
- Nulastin®
And the list goes on…Latisse® is still the only FDA-approved serum but it’s expensive and it can change the color of your eyes. No lie. And it’s pricey. It only works while you’re using it, so you’re making a looooong commitment to having it in your life. I like my eye color so this was a hard pass for me.
My drugstore, over-the-counter (OTC) holy grail eyelash growth product is Physicians Formula Eye Booster 2-in-1 Lash Boosting Eyeliner + Serum [affiliate link].
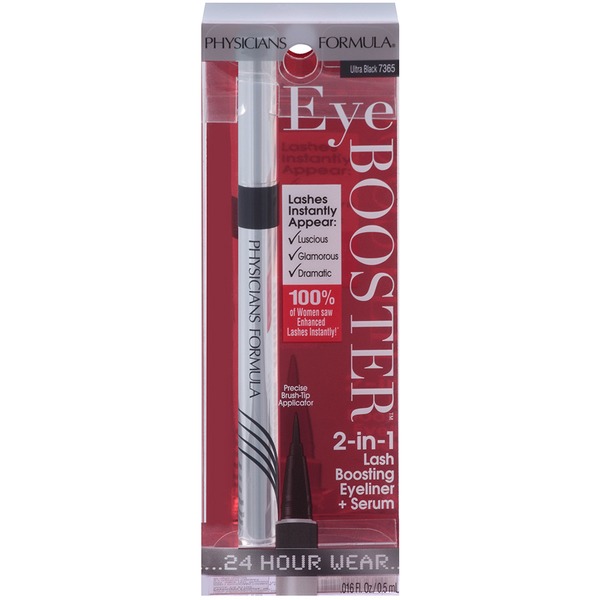
This stuff lasts me about 6 months a tube, replaces my regular eyeliner, doesn’t bother my eyes, lengthens my lash (it takes a few months so be patient), all for under $10!! I gushed about this to my sister who always had short straight lashes. The next time I saw her, I was astonished at how long and curled they were!! I’m a believer!
Replacement
Have you heard of eyelash extensions? Like hair extensions, you can go to a qualified provider and they essentially glue semi-permanent fake eyelashes to your real ones. This presumes you have sufficient real ones and you are willing to invest in the ongoing care and maintenance. I know people who have them and if eyelashes are your thing, this may be the best “feel good” money you spend. You can pop out of bed with the eyelashes of a twenty year old!
While I can imagine a life where that appeals to me…my reality is far more mundane and doesn’t call for it. I don’t want to have to be careful about what types of facial cleansers or makeup I use, commit to another ongoing expense, or have to worry about when they grow out.
Hello, pandemic, I’m looking at you!
Faking It
This brings me to false eyelashes! The most obvious of solutions is simple mascara but that warrants its own blog post because there are so many options and so many formula variations. I have tried 60+ different types and brands of mascara and I’m ready to share all of that experience and insight with you…another time.
Now, we will finally focus on false eyelashes. You probably won’t be surprised by now to know…I have a lot to say on the topic. Let’s start with the basics.
Lash Adhesive
False lashes are held on your lash line with adhesive. There are different colors of lash adhesive, different strengths, and different applications. The challenge with lash adhesive is putting it on in the right amount (not too little and not too much), being patient for it to start to set, and then getting the adhesive off. So…pretty much a challenge at every step.
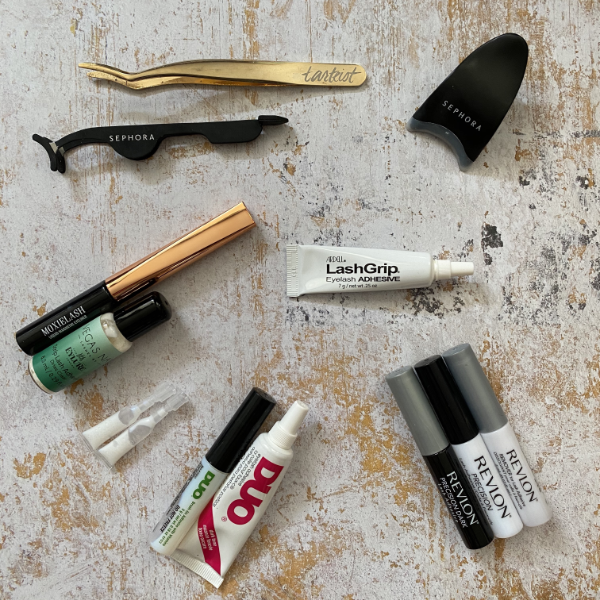
With tubes or wands, the adhesive can be painted directly onto the lash band. Many purchased lashes will come with a single use tube of lash adhesive. Throw it out. It never holds the lashes well enough and you’ll wind up with an eyelash flapping in the breeze. I prefer dark adhesives over white ones (which dry clear) because I feel like they help blend the lash band into the lash line better. My favorites are:
- Duo Striplash Adhesive, Dark Tone [affiliate link]
- House of Lashes® Eyelash Adhesive Good in either light or dark. I find this holds the best and the longest.
- Moxielash® Magnetic Liquid Eyeliner Only for use with magnetic lashes. This is available in a gel form as well but I find the liquid brush an easier formula to use. It’s not a sticky adhesive in the way a glue is – and hands down this is my favorite!
The biggest cautions with adhesive are to use the correct amount to get the lash to stay put the entire time you are wearing them…and…be gentle removing the lashes. Don’t just tear them off. You will lose your natural eyelashes and we don’t need that. Dip a cotton swab in an oil-based cleanser and dab along the lash strip band until the adhesive starts to loosen. Be patient. Use more oil-based cleanser to remove the adhesive residue when you clean your face.
True story: I’ve missed removing some adhesive and my lashes will stick to my eyelids. It’s easy to remedy but it feels really, really weird!
Lash Tools
Positioning lashes is a challenge as well, so there are tools you can use to make it easier. Some lucky people can place them with just their fingers. I am NOT part of that group. I take a lot of deep breaths, start and restart more often than not, and lose my cool. It’s stressful and though I love the look, it’s enough to stop me from wearing them too often. You can use a standard tweezer but I feel weird having anything sharp near my eyes. There are lash tweezers (see photo above) that help place the lashes along your lash line. I find these are generally helpful but avoid that small squat one. I keep that to warn people what NOT to buy. It’s awful. If you want something to help out, try these:
- Sephora Collection Bulls Eye Lash Applicator – This has a nice rubberized finish. If you have smaller eyes, this is an easier one to start with.
- tarte™ Little Lash Helper Lash Applicator – This tool lets you approach the lash application from the side, which has ended up being my personal preference for false lashes.
- Blunt Tip Scissors 3.75″ [affiliate link] – I keep a set of blunt tip scissors in my makeup drawer. They are handy for trimming lashes to length.
Falsies!
After all that build up, we are finally to the meat of it – false lashes. Even here, there’s a lot to learn about lashes. Your options truly are endless. Let’s go through them by type…
Strip Lashes 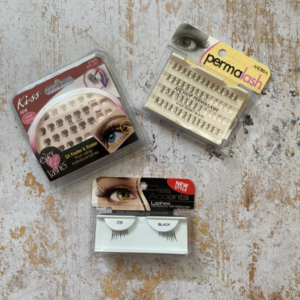
Individual Lashes 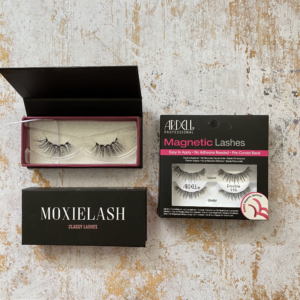
Magnetic Lashes
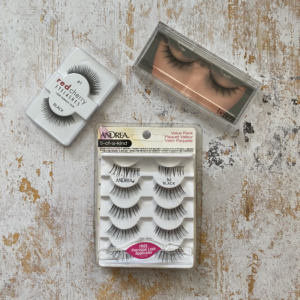
- Strip Lashes – These come in a variety of styles from very subdued to extremely dramatic. It usually takes some trial and error to find a lash style that works for you. Here are some things to consider:
- Lash Band – Some have “invisible” bands which are clear and easy to hide. Others are thick and dark. Generally the thinner the band, the more comfortable they are to wear. However, thinner bands have less space for adhesive, so it’s a tradeoff.
- Stiffness – This is also related to the lash band, but some bands are very stiff. You want to loosen them up by rolling them around to make them more “eye shaped” before you try to stick them to your lids. It will improve adhesion.
- Drama – Sometimes you only need a little boost to make a big difference. I love the look of dramatic lashes, but they are heavy. They can make my eyes feel weighted down and honestly it can feel hard to blink. I favor wispier lashes that are more natural looking.
- Length – Strip lashes are different lengths. If you have a large eye, you will want to find one with a longer lash. If you have smaller or average eyes, you may need to cut the lashes to fit BEFORE you glue them on.
- Individual/Small Cluster Lashes – I was introduced to these by a makeup artist friend who swears by them. She said they are easier to apply, more comfortable to wear and less noticeable if one or two go missing over the course of the night. Of course, she’s right!
- Individual – As it sounds, these are individual lash clusters. You can dip the end in a little adhesive and apply them with tweezers. I tend to lose one or two over the course of an evening, but it isn’t very noticeable.
- Cluster (Trio) – While the individual lashes are helpful, they can be time consuming. You can find individual lashes in triple clusters which give you the ease of applying individual ones but the faster speed of applying strip lashes. Best of both worlds? Pretty much!
- Short Strip – After my foray into strip lashes, these corner or edge lashes came on the market and are a great alternative for people who want just a little extra on the edges. They are shorter and easier to apply. The length helps them stay in place if you get enough adhesive on them.
- Magnetic Lashes – In 2014, magnetic lashes were invented. This innovation addressed the challenges and drawbacks to lash adhesive by using magnets to hold lashes together.
- Sandwich Style / Two Layer – The original magnetic lashes came in a set of two layers (upper and lower). The idea was that your natural lash was sandwiched in between the two magnetic layers. Theoretically there is less damage to your natural lashes, and they are easier to remove. In reality, they are extremely difficult to place because you have to get the top and bottom layer aligned, close to the lash edge (which makes is hard to hold your eye open) and then release gently without tugging as soon as they connect. That’s just a lot going on with both hands and an eye!
- Strip Style / Single Layer – A few years ago, someone finally invented what I think is the perfect solution for magnetic lashes – Magnetic Liner!! As I noted above in the Lash Adhesive section, this allows you to lay down liner instead of putting it on the lash band. The lash band magnetically attaches to the magnetic liner! I was concerned about the impact of magnets near your eye, but so far I haven’t found dermatologists or opthamologists noting concern. Good enough for me!!
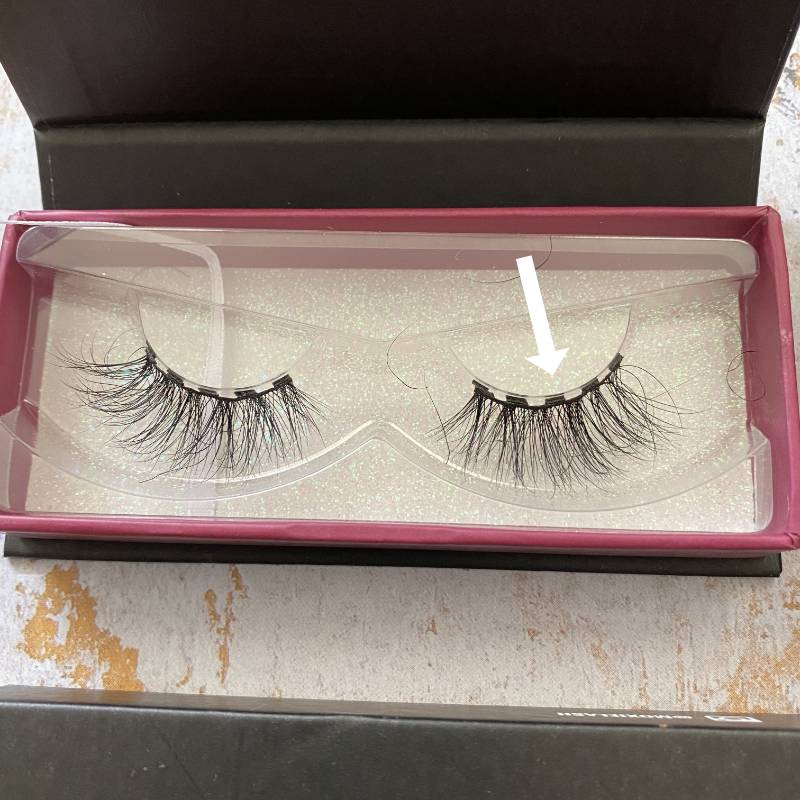
Five-Magnet Single Strip 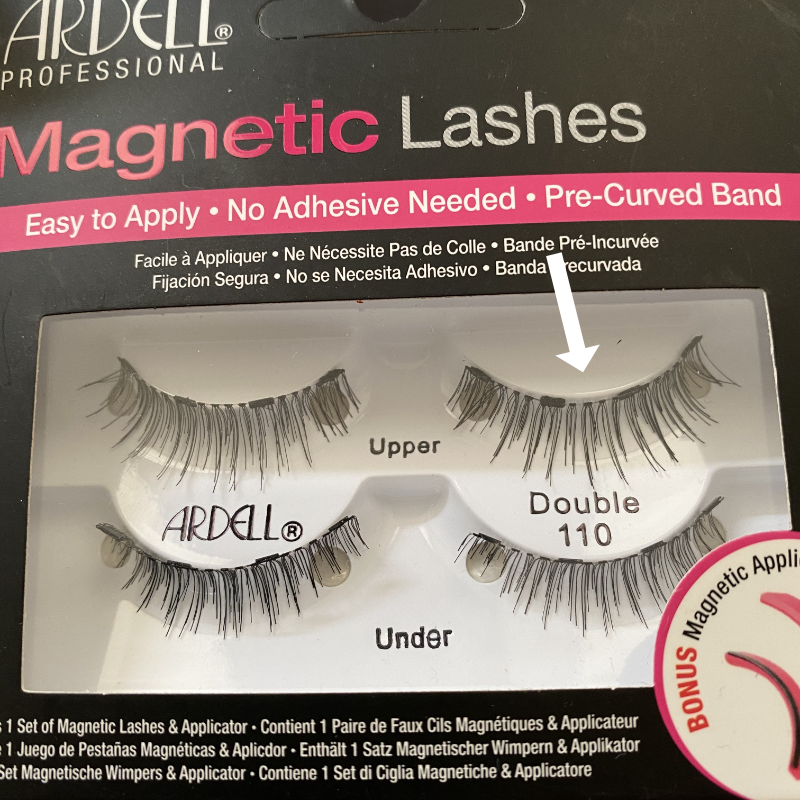
Four Magnet Two Layer
Number of Magnets
The one thing I’ve noticed about the magnetic lashes is that the number of magnets matters! Theoretically with magnetic liner, you could use the top half of a two layer lash set. However, four magnets doesn’t provide a very strong bond. I tested Moxie Lashes which generally have five magnets on their full strip lashes and three on their corner lashes. As I was editing this piece last night, I received a marketing email that they just released some ten magnet strip lashes!
There are more and more options for strip magnetic lashes. Just type in “Magnetic Eyelashes” into Amazon and you’ll end up with a half dozen off brands. Glamnetic is the only other reputable company that interests me personally. They have a range of mink, vegan, and colored lashes with six magnets a piece! I can’t speak to their magnetic liner, but I’d be pretty happy that six magnets are going to have a strong hold for you.
UPDATE: 9/3/2020 I just saw there is a Labor Day Sale from Glamnetic going on for selected items. Use code: HUGE40 to get 40% off!
Tip: With cleaning, disinfecting, and care, you can reuse false eyelashes multiple times. Magnetic lashes last longer because they require less cleaning. Just use a cotton swab with alcohol to disinfect the band area before each use. They are pricey, but you won’t need to invest in them very often.
Now I’m curious to know have you tried lashes or will you?
Disclosure: I am a participant in the Amazon Services LLC Associates Program, an affiliate advertising program. Some of these links are affiliate links. If you click a link and buy something, I may receive a commission for the sale. It does not cost you anything extra and you are free to use the link or not. Product purchases for review are made with my own money and my opinions are my own. If product is ever provided or the article is sponsored, it will be clearly noted at the top of the page.